Portal Creation
This page walks you through the exact steps to create a new client's portal in GoHighLevel — a task that must be completed immediately upon payment and sets the foundation for their entire experience with us.
Portal Creation — Step-by-Step Guide
This guide walks Onboarding Specialists and other members of Customer Service through the complete process of creating a new client's portal in GoHighLevel (GHL). This must be completed within at least 30 minutes of a client's payment being received if it is during business hours.
Portal creation should take approximately 10–15 minutes per client. Complete this task immediately when you receive a new client notification.
Before You Begin
Confirm you have the following information from the client's purchase record:
- ✅ Client's full name
- ✅ Client's email address
- ✅ Client's phone number
- ✅ Plan purchased (Essentials/Accelerated/Momentum)
- ✅ Mark the invoice as paid if it is a web purchase or the payment was made through CashApp or Zelle
- ✅ Add any special instructions the Dispute Team must know in Additional Information on DisputeFox
Step-by-Step: Creating the Client Portal
Step 1 — Verify Payment in GoHighLevel (GHL)
Once you receive a portal creation request from the closer:
- Copy the client’s full name
- Open GHL (GoHighLevel)
- Paste the client’s name into the search bar
- Verify that the payment has been successfully processed
- Confirm the membership type purchased:
- Accelerated
- Essential Membership
- Momentum (6-Month Bundle)
After verification:
-
- Mark the client with a ⭐ (star) on GHL
Step 2 — Open Client in DisputeFox (DF)
- Open DisputeFox (DF)
- Navigate to the Client Tab
- Locate the client under Active Clients
- Click on the client's name
Step 3 — Verify Client Details
- Go to the Account Tab
- Copy the client’s First Name (this will be used for the password)
- Navigate to Client Settings
- Confirm the membership status:
- For English-speaking clients: Essentials (Slow Delete); For Spanish-speaking clients: Essentials (Spanish Slow Delete)
- All clients: Accelerated (Accelerated)
- All clients: Momentum (6-Month Bundle)
If Spanish-Speaking client:
Assign the correct agreement based on the client’s plan:
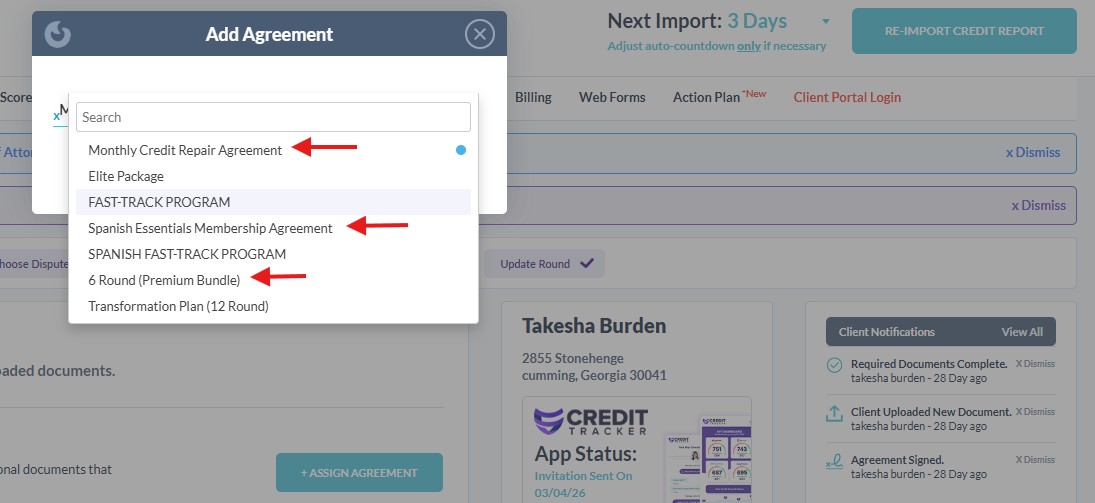
-
- Essential (Slow Delete) → Spanish Essential Membership
- Accelerated → Monthly Credit Repair Agreement
- Momentum → Six Month Premium Bundle
Portal Settings
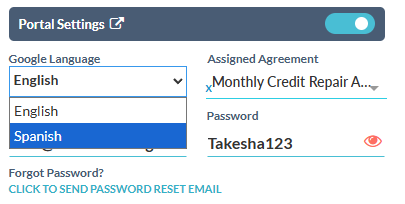
- Go to Portal Settings
- Locate Google Language
- Change language to Spanish
Step 4 — Update SMS Settings
- Locate SMS References
- Click Opt-Out
Step 5 — Update Portal Password
- Go to Portal Settings
- Click the 👁 (eye icon) to view the current password
- Update the password using the following format: FirstName123
- No spaces
- Use only the client’s first name
- Add “123” immediately after
- E.g. Maria →
Maria123
Step 6 — Assign Agent
Step 7 — Send Credit Tracker Invitation
- Scroll to Credit Tracker App Status
- Click Send Invitation
- In the pop-up window:
- Click Send or Save & Send
- Click Send or Save & Send
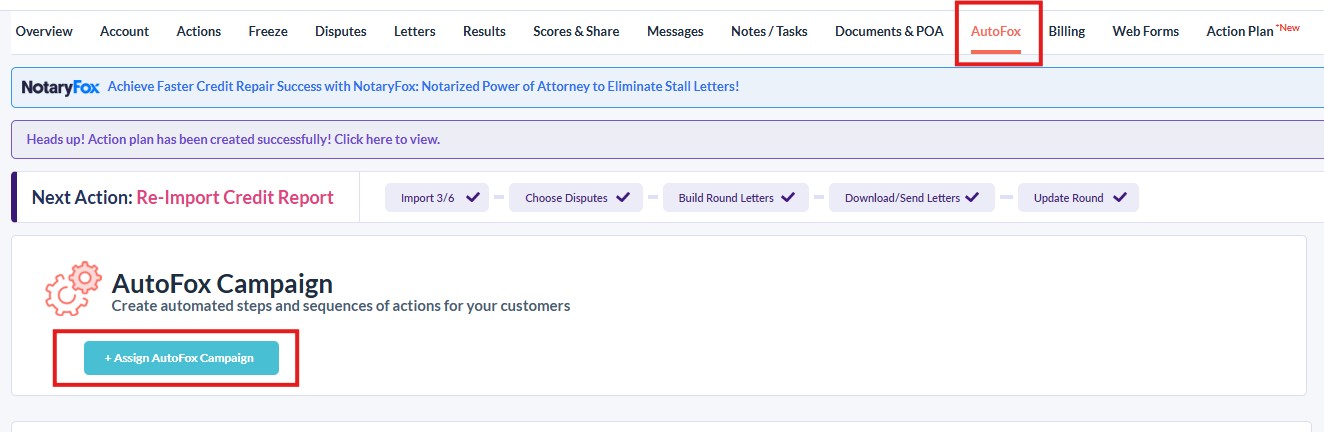
Step 8 — AutoFox Assignment
- Click on AutoFox
- Click Send or Assign
This will generate and send the client’s login credentials.
⚠️ Important — Double check if the onboarding email is reflected by viewing the conversation with the client on GHL
Step 9 — Send Portal Creation Message (GHL)

- Return to GHL
- Send the prepared portal creation snippet to the client
If Spanish-Speaking client:
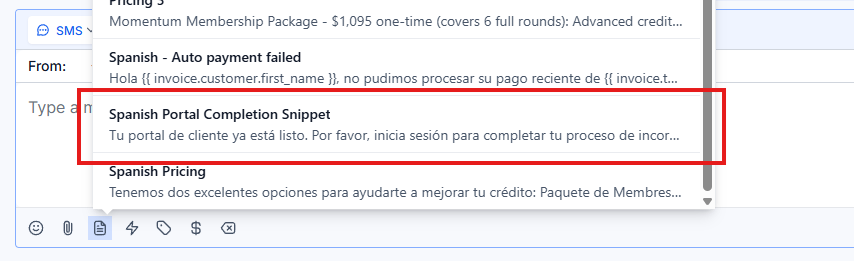
- Return to GHL
- Send the prepared Spanish portal creation snippet to the client
Step 10 — Update Closer (Discord)
- Open Discord
- Reply to the closer’s request
- Send: Done